Earth's Moon
- Alyssa Manus

- Jan 31, 2023
- 3 min read
Updated: Feb 16, 2023
On January 10, 2023, I requested a set of lunar images from Skynet’s PROMPT-MO telescope. The goal was to collect a set of seventy-five total images and “collage” them together to get a full color image of Earth’s moon. This post will walk you through the entire process of collecting, processing, and editing to acquire the final result (shown below).
Observe
The first step was to enter the observation into Skynet’s system of robotic telescopes. Unfortunately, the images that were returned from PROMT-MO had some issues. I used a classmates observation from was PROMPT-5, a telescope from the Cerro-Tololo Observatory in Chile. Thank you Ryan Brown! This telescope has a field of view of ten arcminutes, so he requested a set of 5×5 tiles to align and stack together to create a full mosaic of the moon. He requested a total of 75 images, 25 with each of the three different filters; U, OIII, and Halpha. This allowed me to create a color image.
Process
I uploaded all 75 images into Afterglow to start processing and creating the final image. The first step in Afterglow was to align all 75 images using the Aligner tool. I selected all of the images, enabled Mosaic Mode, Features Mode, and adjusted the Ratio Threshold to 0.3. After that processed, I began the stacking job. Using the stacking tool, I selected the aligned images with the U filter and turned on Multiplicative, Additive, and Global Equalization, and submit the job. I then did the same with the OIII and Halpha filters. Once that was done, I changed the color map from gray to the respective filter colors (Halpha as red, OIII as green, U as blue) and used the midtone stretch mode, which resulted in the three following images.
I then selected all three images and grouped them together, creating a merged image of the entire colored moon.

Edit
After using Afterglow to create the mosaic, I exported the image as a JPG file and imported it into an image editing software. Here, I adjusted the exposure, highlights, shadows, saturation, and sharpness to bring out more color and features in the image. I also rotated the image to accurately reflect how to moon looked as seen from Earth.


Colors and Craters and Maria , Oh My!
It’s easy to notice the different colors and dents in the moon, especially when edited to accentuate them. Let’s talk about some of the most prominent features!

The bright spot labeled 1 (seen to left) is called Aristarchus Crater and the brownish area on its left is the Aristarchus Plateau. The bright white-blue crater is given its color by titanium rich glassy deposits. The yellow brown plateau is covered with orange glass sea deposits.
The large dark brown-blue spots labeled 2, 3, 4, and 7 (seen below) are all lunar maria. In order, they are called Mare Imbrium, Mare Serenitatis, Mare Tranquillitatis, and finally Mare Nectaris. These areas were formed by volcanic activity caused by very, very old asteroid impacts. They are full of iron and titanium basalts, as well as iron and titanium rich lava.
(Mare Imbrium, Mare Serenitatis, Mare Tranquillitatis, Mare Nectaris)
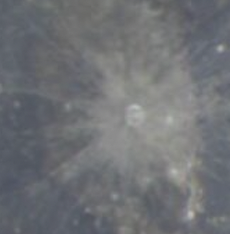
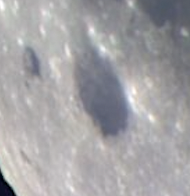
The craters labeled 5 and 6 are the Kepler Crater and the Copernicus Crater. These impact crater areas are covered in ejecta. Under the ejecta, there are large basalts and lava flow. The dark spot on the lower left, labeled 8, is the Grimaldi Crater. It stands out with great contrast against the brighter areas surrounding it. Lastly, the Tycho Crater (labeled 9) is one of the most eye-catching spots on the southern region of the moon. This crater is still relatively young as its rays are still bright and visible.


Comments